Produce Your Own Music: A Deep Dive From Idea to Mix
MuseGen Team
5/12/2026
You sit down with a spark of a hook in your head... and somehow two hours later you've got eight bars looping, a dozen plugins open, and no clear "song" yet. If that sounds familiar, you're not alone. Learning to produce your own music is less about secret gear and more about a repeatable workflow - from idea, to arrangement, to a mix that translates on phones, cars, and headphones. Let's walk the whole path with pro-level clarity, beginner-friendly steps, and a few modern AI shortcuts when you need momentum.
What it really means to produce your own music (and why it feels hard)
To produce your own music means you're the decision-maker across the full chain: writing, sound selection, recording, arranging, editing, and mixing (and often light mastering). The reason it feels overwhelming is simple - each stage asks for different "ears." The writer ear wants emotion, the engineer ear wants clarity, and the producer ear wants direction.
In my own sessions, the biggest breakthrough wasn't buying anything; it was separating tasks. When I stopped "mixing while writing," I finished more songs and liked them more.
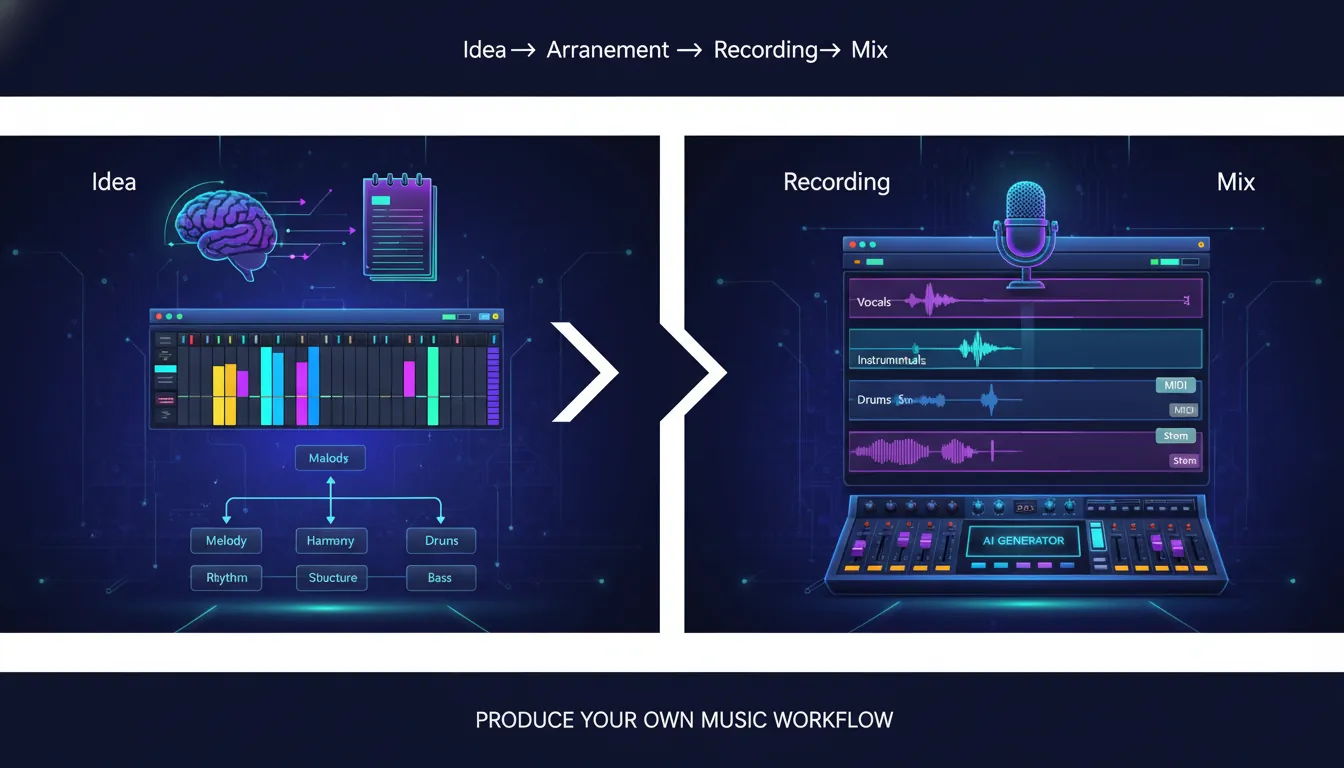
The core workflow: Idea -> Build -> Arrange -> Record/Edit -> Mix
A reliable workflow keeps you from staring at a blank project. Both mixing educators and production companies stress that a consistent start-to-finish process reduces overwhelm and gets you to release-ready results faster (see iZotope's end-to-end overview and workflow thinking from Mastering.com). Here's the practical version you can repeat.
1) Capture the idea fast (before your brain edits it)
Start with one strong anchor:
- A chord progression on keys/guitar
- A drum groove + bass pocket
- A topline melody you hum into your phone
- A "reference track" you admire (tempo, vibe, structure)
Quick rule: don't judge sound quality yet. Your goal is to catch the emotion and tempo.
If you're stuck, I often use a reference-track "reverse engineering" pass: identify tempo, chord movement, and where the hook lands, then write something new with those principles (not a copy). That approach is commonly recommended in production workflow breakdowns like Mastering.com's workflow guide.
2) Build the loop into a section (not just 8 bars)
Most unfinished projects die as perfect loops. To produce your own music consistently, convert your loop into at least two contrasting sections:
- Verse (less energy, fewer layers)
- Chorus/drop (more energy, clearer hook)
A simple build checklist:
- Drums: kick/snare/hat with intentional pattern changes
- Bass: supports the groove and chord roots (or counterline)
- Harmony: chords/pads/guitars
- Lead: vocal or lead synth (your "story")
3) Arrange using subtraction (the fastest way to get a full song)
A practical method I've used for years: duplicate your loop across 3 minutes, then remove parts to create sections. This "subtractive arranging" approach is widely taught in electronic production education because it forces structure decisions quickly.
Try this structure (works for many genres):
- Intro (8-16 bars)
- Verse (16 bars)
- Pre-chorus/build (8 bars)
- Chorus/drop (16 bars)
- Verse 2 (16 bars)
- Chorus/drop (16 bars)
- Outro (8-16 bars)
Pro tip: add "ear candy" every 4-8 bars (a fill, riser, reverse, one-bar mute). That tiny motion makes the track feel finished.
4) Record and edit for confidence, not perfection
If you record vocals or instruments, focus on clean capture:
- Record at safe levels (avoid clipping)
- Do multiple takes and comp the best lines
- Tighten timing gently (don't remove all human feel)
- Clean obvious noises between phrases
Home studio setup doesn't need to be expensive, but it needs to be stable and quiet. Solid overviews from Audient's budget home studio checklist and Berklee's guidance on starting a recording space are good reality checks: you can do great work with limited gear if your room and monitoring decisions are sensible.
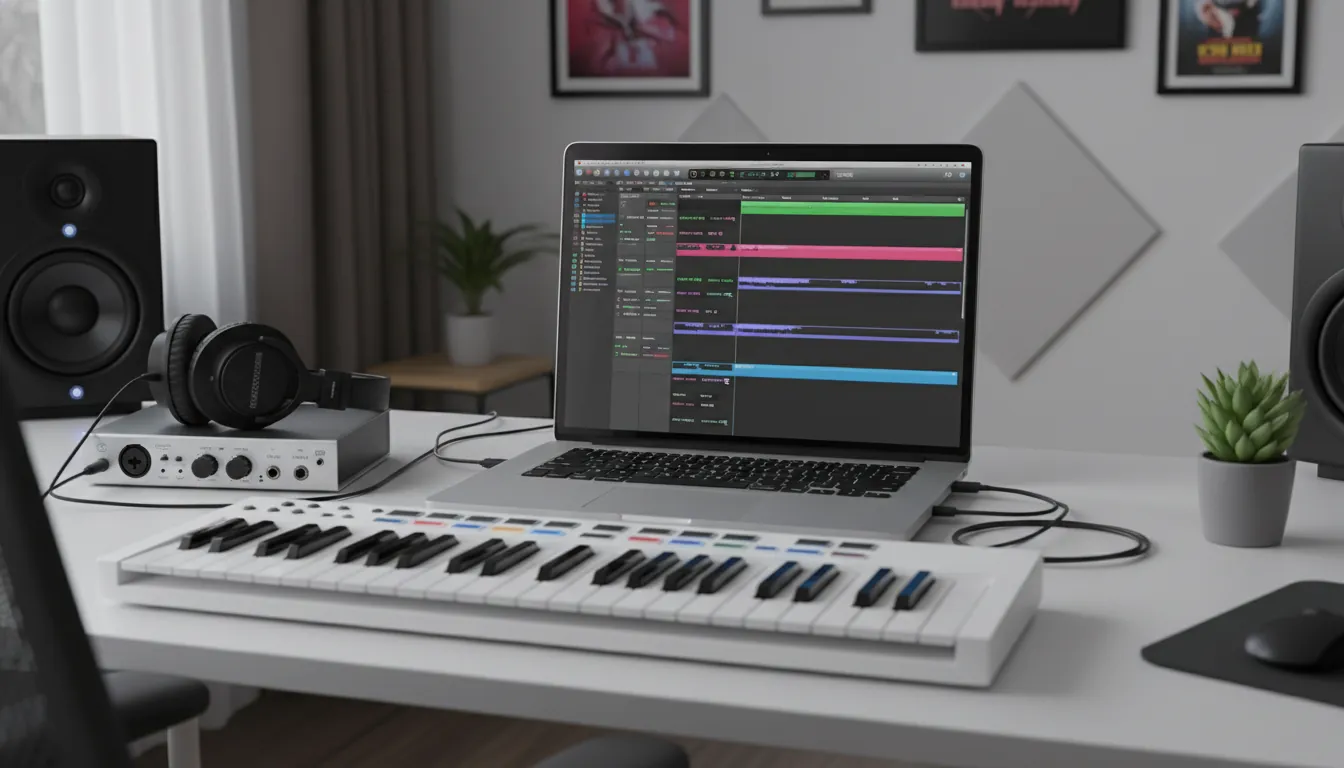
Your home studio essentials (and what you can skip at first)
You can produce your own music with just a laptop and headphones, but the "minimum viable studio" usually includes:
- Computer + DAW
- Headphones (closed-back for recording, decent for mixing)
- Audio interface (if recording mics/instruments)
- Microphone (if recording vocals)
- Optional: MIDI keyboard for speed and feel
Quick comparison: starter setups
| Setup level | Best for | What you need | Typical tradeoff |
|---|---|---|---|
| Laptop + headphones | Beatmaking, MIDI, learning | DAW + stock plugins + headphones | Mixing translation is harder |
| Creator studio | Vocals + instruments | Add audio interface + mic + pop filter | Room noise can affect vocals |
| Mix-ready room | More reliable mixes | Add monitors + basic treatment | Costs more, takes space |
Gear trap to avoid: buying plugins before you've mastered stock EQ, compression, reverb, and delay. Many engineers recommend learning fundamentals first because the technique matters more than the brand of tool.
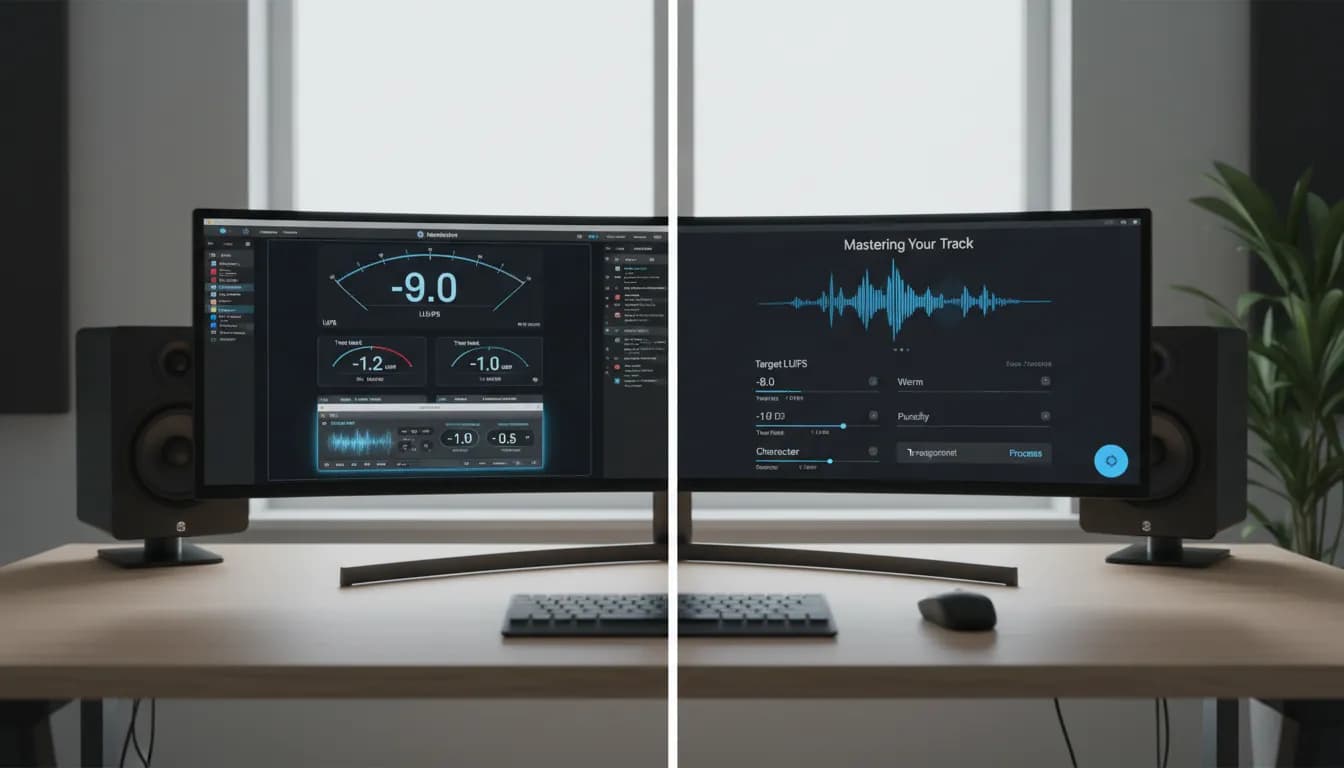
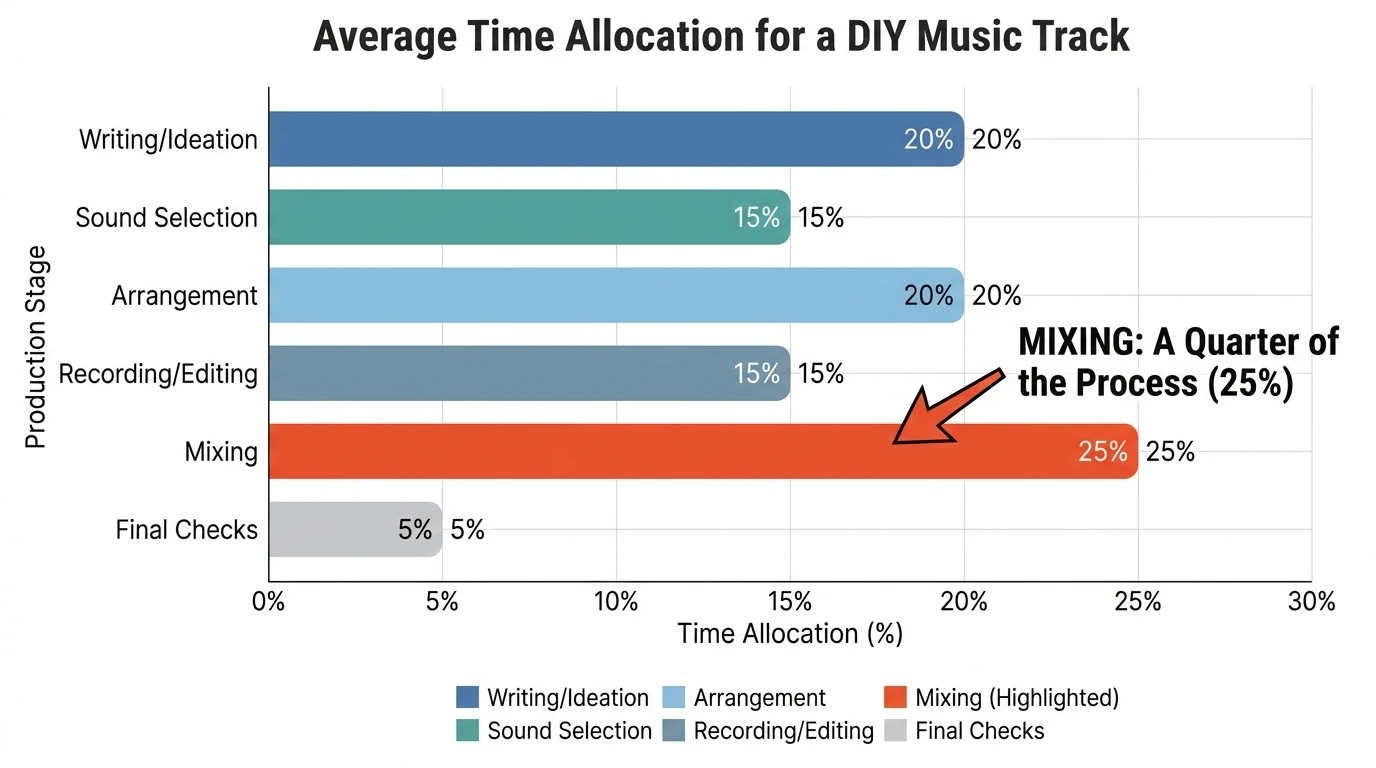
Mixing: how to make your track sound "finished" (without overcomplicating it)
Mixing is where you turn a pile of parts into a single record. A clean, repeatable mixing order matters. Strong mixing resources often recommend starting with the big picture - levels and balance - before obsessing over details.
Step 1: Do a static mix (levels + panning first)
Before any plugins:
- Pull all faders down
- Bring up the most important element (often vocal or drums)
- Add bass, then harmony, then leads, then effects
- Pan for space (keep kick/bass/vocal centered)
This is the "foundation" approach: if the balance is wrong, plugins only polish the wrong thing. Guidance like Mastering The Mix's balancing advice aligns with this principle.
Step 2: EQ to create space (cut clashes, don't chase perfection)
Think in conflicts:
- Kick vs bass (low-end mask)
- Vocal vs guitars/synths (midrange crowding)
- Hi-hats vs vocal brightness (high-end harshness)
Use EQ to make room:
- High-pass non-bass elements where appropriate
- Cut muddy buildup (often low-mids) on competing parts
- Use small moves; compare before/after at matched loudness
For a solid, practical breakdown of EQ, compression, reverb, and delay in a home context, Careers In Music's mixing guide is a helpful overview.
Step 3: Compression for control (not loudness)
Compression is about consistency:
- Vocals: smoother levels so words don't disappear
- Bass: stable foundation under the track
- Drums: punch and cohesion (or parallel compression for density)
If you hear pumping or dullness, back off. In my own mixes, the best compression moves are the ones you notice only when you bypass them.
Step 4: Reverb + delay for depth (keep it intentional)
Depth is a mix's "3D." Reverb and delay place sounds in a space, but too much makes a track feel far away. A common pro workflow:
- Use send/return reverbs (one or two shared spaces)
- Roll off low end in the reverb (keeps the mix clean)
- Use shorter reverbs for clarity, longer for drama
If you want a detailed look at reverb choices and wet/dry balance, SonalSystem's mixing essentials breakdown is a useful reference.
Step 5: Check translation (your mix must survive the real world)
Listen on:
- Your main headphones/monitors
- Phone speaker (mono problems show up fast)
- Car system
- Low volume (balance test)
Tiny habit that helps: take 10-minute breaks every hour. Ear fatigue makes you boost highs and over-compress.
How AI can help you produce your own music (without replacing your taste)
AI is most valuable when it speeds up the boring parts and unblocks momentum. In practice, I've found AI works best for:
- Generating starter ideas (chords, melodies, beat directions)
- Rapid genre exploration (finding a palette fast)
- Draft vocals/lyrics to test toplines
- Stem-based editing workflows (swap parts without rebuilding)
MuseGen is built for exactly this kind of acceleration: text-to-music, style control, stem exports (WAV) and MIDI for deeper edits, plus tools like AI vocals/lyrics and smart mix/master. The key is to treat AI like a co-writer: you steer the taste, it accelerates iteration.
A practical AI-to-DAW workflow:
- Generate 3-5 drafts from a clear prompt (mood, tempo, instruments)
- Pick the best 8-16 bars (your "seed")
- Export stems + MIDI
- Arrange and re-produce in your DAW
- Mix with your own balances and space choices
Music Production For Beginners (Step By Step Masterclass)
"Produce your own music for free": what's realistic
You can produce your own music for free, especially if you're learning:
- Use a free/low-cost DAW tier or trial
- Rely on stock plugins
- Use free sample packs responsibly (check licenses)
- Record vocals with what you have (even a phone) for demos
What you'll eventually pay for isn't "better music" - it's faster workflow, better monitoring, and fewer technical limits. Start free, then upgrade the bottleneck that's actually slowing you down.
Quick facts people ask (and how they relate to production)
- What is the most sold single of all time? Commonly cited is "White Christmas" (Bing Crosby), though exact totals vary by accounting methods and eras. The takeaway: timeless songs often rely on simple, strong melodies and clear emotional delivery - still the core of modern production.
- What's the catchiest song ever written? One widely shared research claim points to Queen's "We Are the Champions" as highly "catchy." Whether or not you buy the ranking, the lesson is usable: repetition + singable intervals + strong rhythm = memorability.
- Could Frank Sinatra read music? He's often described as not being a strong reader of standard notation and leaning on ear, phrasing, and arrangement support. For producers, that's encouraging: great musical results don't require perfect theory, but they do require intentional listening.
- Can music help lower cortisol / stress? Research suggests music can support relaxation for many people. As a producer, don't ignore this: calmer listening environments help decision-making and reduce ear fatigue.
Conclusion: your first finished track beats your 50th loop
When you produce your own music, the goal isn't perfection - it's completion with direction. The real skill is learning which decision comes next: capture the idea, build two sections, arrange with subtraction, edit for confidence, then mix from balance to polish. I've watched more careers start from one finished release than from years of "almost done" sessions.
If you want to move faster, test a hybrid workflow: generate a strong seed, export stems/MIDI, and finish the record with your own arrangement and mix choices - your taste stays in charge.
FAQ: Produce Your Own Music
1) What do I need to produce your own music at home?
A DAW, headphones, and a computer are enough to start. Add an audio interface and mic if you'll record vocals or instruments.
2) How long does it take to produce your own music from idea to mix?
A simple track can take a few hours; a release-ready production often takes days to weeks. A consistent workflow shortens the gap.
3) What's the best DAW for beginners?
The best DAW is the one you'll open daily. Try a few trials and pick based on workflow (beatmaking vs recording vs live performance).
4) How can I produce your own music for free without pirating?
Use free DAWs or trial versions, stock plugins, and legitimately free sample packs. Focus on learning arrangement and mixing fundamentals.
5) Why do my mixes sound good in headphones but bad in the car?
Translation issues usually come from low-end balance, midrange clutter, and over-wide stereo effects. Check your mix in mono and at low volume.
6) Should I mix while I write?
Light "vibe mixing" is fine (basic levels and a rough reverb), but avoid deep EQ/compression decisions until the arrangement is stable.
7) Can AI help me produce your own music if I don't know theory?
Yes - AI can generate starting points and variations. You still choose what feels right, then refine with arrangement and mix decisions.