How to Star in Your Own AI Music Video: A Photo-to-MV Guide

MuseGen Team
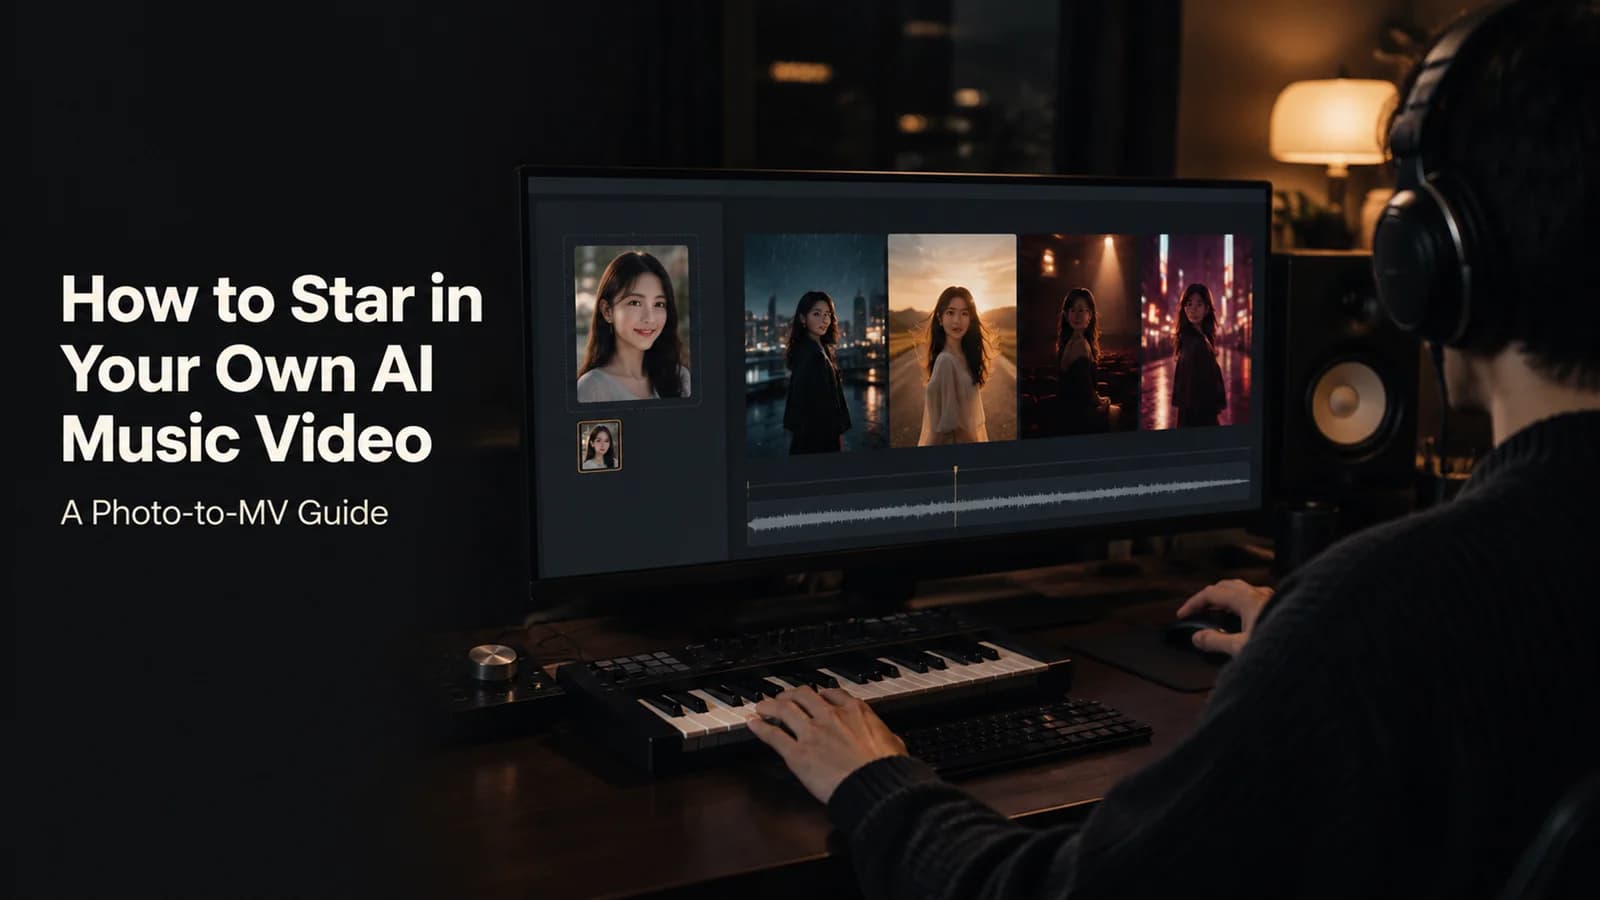
An AI music video does not have to star a stranger. MuseGen’s Image to Video mode takes one photo of you, a finished song and an optional description, and builds a music video around them. This walkthrough follows the flow in the order you meet it: the song, the photo and its face check, the description box, the story and first frames you can edit, the free preview, and what it costs and how long it takes.
What this walkthrough covers
The steps from a finished song and one photo to a downloadable MP4, with the limits stated where they apply. Every figure below was read from MuseGen’s own Create MV page, pricing page and terms, with the date in the quick facts.
- Pick a clear photo. One face, good light. A face check runs, and if it finds no usable face the video is made in scene-only mode.
- Describe what the camera sees. Setting, mood, camera movement and colour, or leave the box blank and let MuseGen plan from the song.
- Fix the story before you pay for video. Edit six plot parts, any scene, and regenerate single first-frame images.
- Preview 15 seconds for free, then decide. The full video costs 2 credits a second in Standard and 4 in HD, and the credits are shown before you confirm.
- Check size and rights. 16:9 or 9:16, Standard 480P or HD 768P, and permission for any photo that is not yours.
Quick facts
- Where you work: Create MV in the sidebar, then the Image to Video tab.
- Photo: One image: JPG, JPEG, PNG, WebP or HEIC, up to 20 MB (page defaults).
- Song: 30 seconds to 6 minutes, up to 30 MB: MP3, WAV or M4A, as the upload dialog states. Or pick from your library, or import a link.
- Text fields: Description optional, up to 1,000 characters; MV title up to 30 characters; an author name field.
- Shape and size: 16:9 or 9:16; Standard (480P) or HD (768P).
- Cost: The script step costs 10 credits after any free generation; a free 15-second preview comes before the full video, which costs 2 credits per second in Standard and 4 in HD (100 seconds is 200 or 400 credits, about $4.80 or $9.60 by the pricing page); failed jobs are refunded. New accounts get 25 one-time credits.
- Time: Script usually 10–15 minutes; full video about an hour (interface text).
- Checked: 5 November 2026, against MuseGen’s Create MV page, pricing page and terms.
What Image to Video is
MuseGen’s Create MV page has two tabs. Music to Video builds the video from the song alone. Image to Video adds one photo, and the page asks for it: leave the photo out and it tells you to upload a character image. Either way the starting point is a finished song, not a text prompt, so the video follows the song’s structure rather than inventing its own length.
If you do not have the song yet, make it first. The lyrics generator writes the words and the song maker turns them into a track, in the same place. This page is about the video step only; our general guide to making an AI music video covers aspect ratios for each platform and the YouTube and Spotify rules.
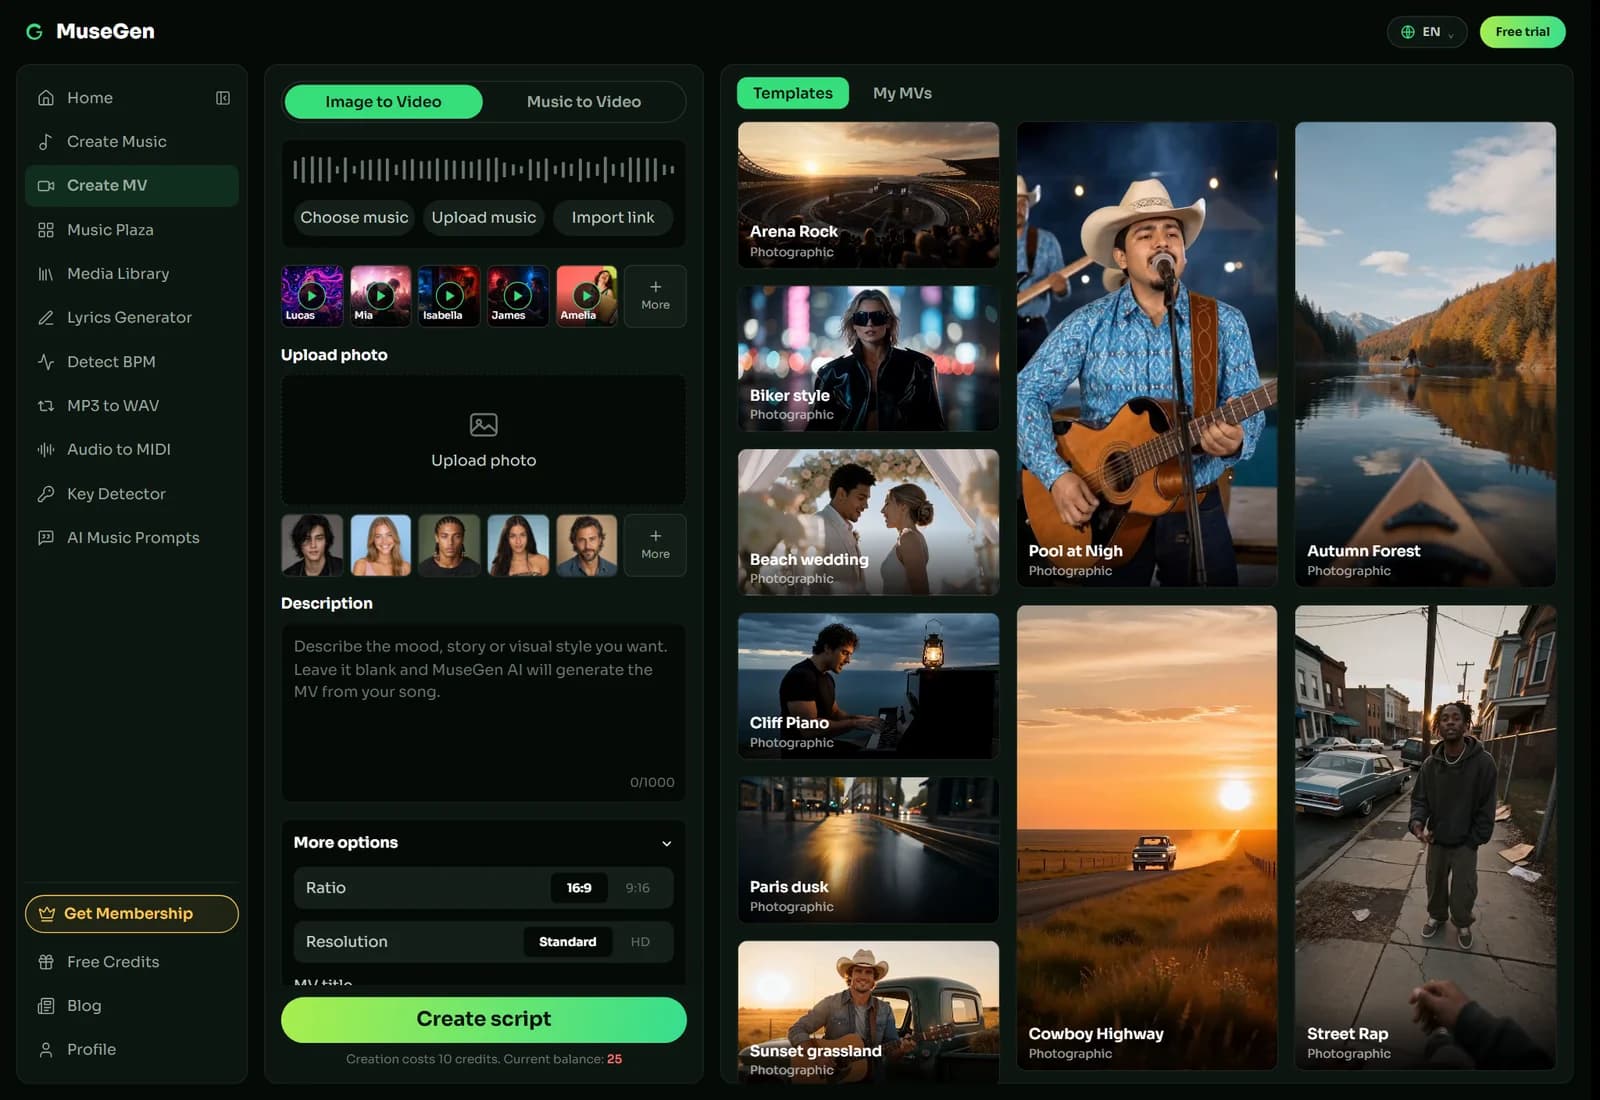
The Image to Video tab: song, photo, description and options on one page, with the 10-credit script step at the bottom.
Step 1: Choose the song
There are three ways in. Choose music opens your own library, Upload music takes a file, and Import link pulls a track from a URL. A row of sample tracks sits underneath if you only want to see how the page behaves. The upload dialog says it supports MP3, WAV or M4A, up to 30 MB and between 30 and 360 seconds, so a song can run from 30 seconds to 6 minutes.
If you upload a file, the dialog asks for the lyrics, which the page says are used for the video’s subtitles. It also cautions that small corrections are fine, while large rewrites can pull the subtitles out of step with the vocals. You can add a custom cover as well (JPG, PNG or WebP, up to 10 MB, square works best); a new cover only affects videos made after you change it.
Step 2: Choose and check your photo
Press Upload photo and pick one image. By the page defaults it can be a JPG, JPEG, PNG, WebP or HEIC file up to 20 MB. If you would rather try the flow first, a row of sample faces sits under the upload box. The page labels the photo “Only for model reference”.
The page then runs a check, showing “Analyzing photo…”. If the check cannot finish it says so and asks you to replace the photo before you continue. If it finishes and finds no usable face, it says “No usable face detected — generating in scene-only mode”, which means a video without you in it. That makes the choice of photo the one decision here with a real consequence.
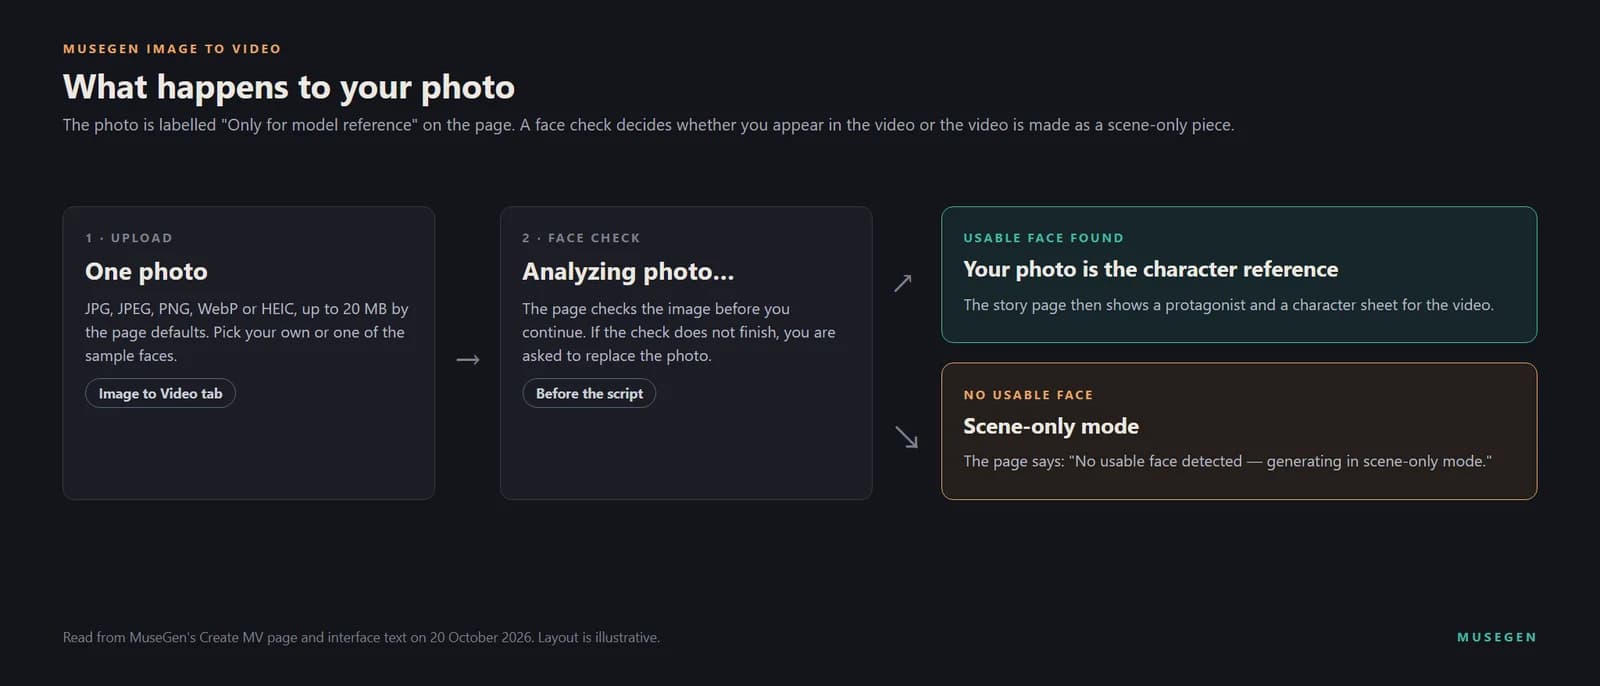
What happens to your photo, read from the page and its interface text.
A practical rule for the photo: use a clear, well-lit picture in which one face is visible and nothing covers it. That is our advice, not a rule printed on the page, but it is the situation the face check is built to recognise.
Use your own photo, or the photo of someone who has agreed to appear. MuseGen’s terms say you must have all necessary rights and permissions for any audio, video, image, text prompt or other material you use as MV inputs.
Step 3: Describe the video, or leave it blank
The description box says: “Describe the mood, story or visual style you want. Leave it blank and MuseGen AI will generate the MV from your song.” It takes up to 1,000 characters, so a sentence or two is plenty. The most useful descriptions say where it happens, how it should feel, how the camera moves and what the colours are.
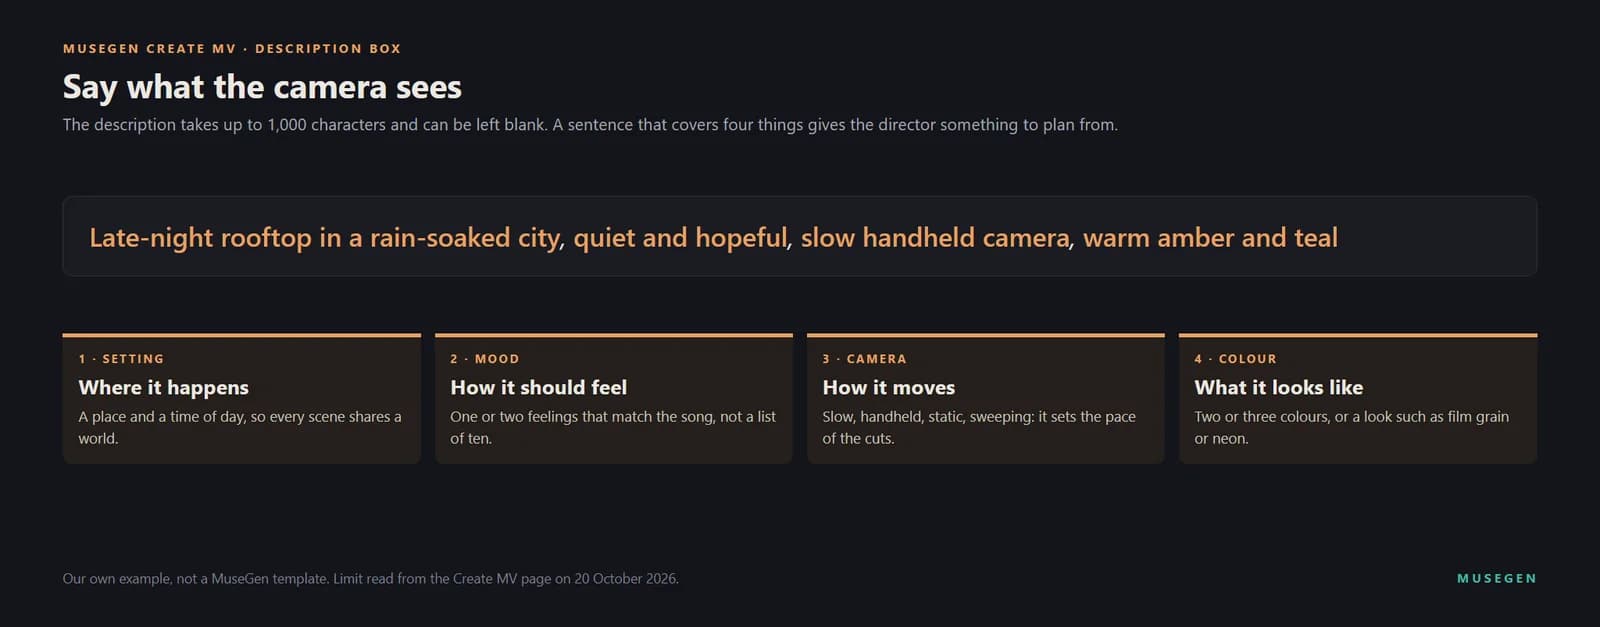
One sentence that covers setting, mood, camera and colour.
Three descriptions of our own, for different songs, to copy and change:
▶ Examples to adapt Golden-hour road trip through open country, nostalgic and warm, slow tracking shots from the passenger seat, faded film colours Night-time city block, confident and gritty, handheld camera at street level, high-contrast neon and deep shadow Empty theatre after the show, tender and quiet, slow push-in on a single spotlight, deep blue and soft gold
Keep one setting and one mood per video. A description that asks for five locations gives the director five directions to split the song between.
You can also start from a style template instead of writing anything. The gallery on the right shows templates such as Arena Rock, Biker style, Beach wedding, Cliff Piano, Paris dusk, Cowboy Highway, Sunset grassland and Street Rap, each marked Photographic. Hover over one to see View and Use template; the chosen template appears above the description box as a style template chip.
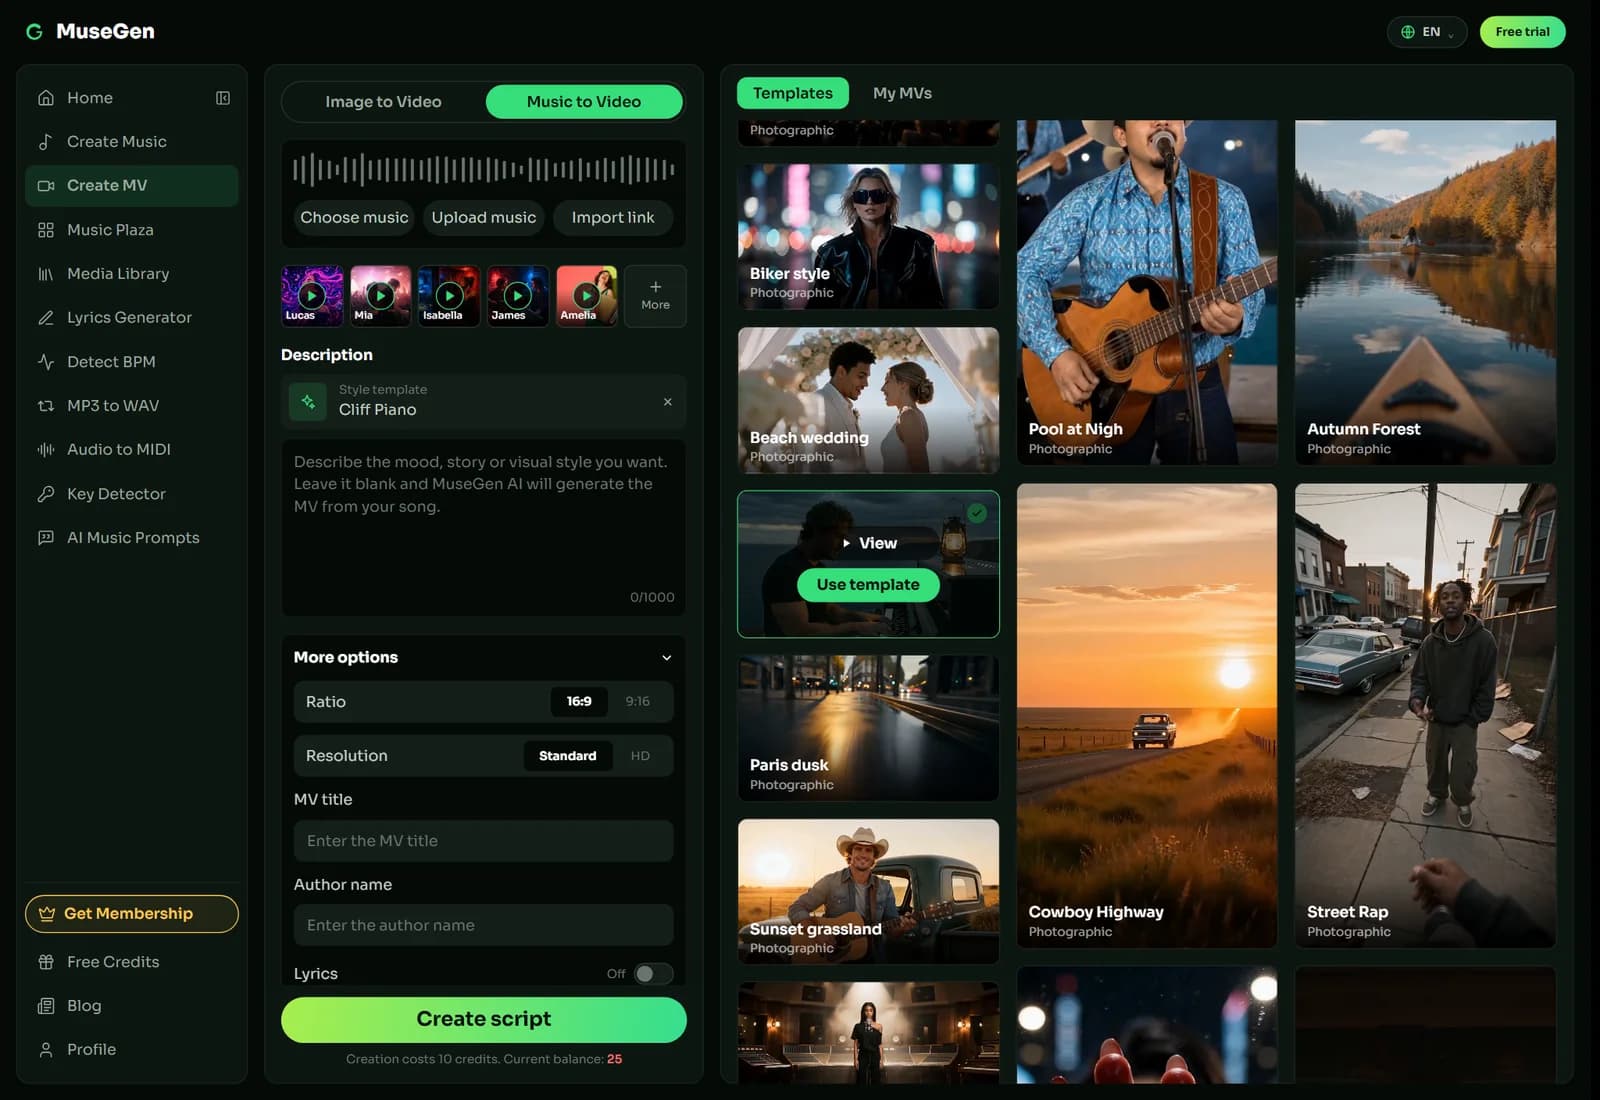
A style template chosen from the gallery, with the options that follow it.
Under More options you set the ratio (16:9 for landscape, 9:16 for vertical), the resolution (Standard is 480P, HD is 768P), the MV title (up to 30 characters), an author name and a switch that shows the lyrics on screen. The pricing page lists HD music video creation as a membership benefit.
Step 4: Create the script and read the story
Press Create script. It costs 10 credits; the page says a free generation is used first and the credits are deducted only when none remain. New accounts start with 25 one-time free credits. The page warns that the script usually takes 10 to 15 minutes, and that you can leave and come back: the project waits under My MVs, and an e-mail arrives when it is ready.
While you wait, the project moves through labelled states: Preparing assets, Analyzing, Preview ready, Paid, Producing and Completed, with Failed and Discarded as the two other outcomes. Preview ready is the one that matters, because that is where you decide whether to spend more.
When it is ready the page shows an overview, a cover, the story, a protagonist with a character sheet, and the scenes. The story is split into six plot parts, each labelled “Click to edit”. Each scene has its own text that you can edit and revert, and a Keyframes view shows the first-frame image for every shot, with a way to view each larger.
Step 5: Fix the story and the shots
This is the step that makes Image to Video worth using, and it has an order. There are two kinds of fix, and the first undoes the second.
- Adjust story. Edit the six plot parts, then press Adjust story. The page warns that changing the story direction replans every storyboard and image and replaces the existing visuals, and asks you to confirm.
- Regenerate image. On a single shot, Regenerate image replaces that shot and returns it to generation. The page asks you to confirm this too.
- Edit a scene. Each scene’s text can be edited and reverted, with a minimum length the page tells you about.
So fix the story first, and only then go shot by shot; a story change throws away any single image you already corrected. A shot marked “Failed” can be regenerated on its own, so one bad shot does not mean starting again.
Step 6: Preview, then unlock the video
MuseGen offers “a free 15-second video preview so you can decide whether to pay based on the result”. Watch it against your song. If it is what you wanted, the cost dialog shows the length of the full video, the credits it needs and an approximate US dollar amount, and unlocking starts the production. Nothing is charged for the full video until you confirm that step, and if creation fails the page says all credits are refunded.
The price is published. The pricing page says Standard costs 2 credits per second and HD 4 credits per second, so a 100-second video is 200 credits (about $4.80) in Standard or 400 credits (about $9.60) in HD, and membership credits and purchased credits never expire. If your balance is short, a dialog tells you how many credits the video needs and how many you have, and offers a plan or a credit pack. The pricing page lists two plans, Pro and Max, with weekly prices from $9.99 at the promotional price shown on 4 November, and monthly and yearly options on the same page.
After you confirm, the page says the video usually takes about an hour. Leave and come back. You can discard a project after the script, but the script fee you have already spent is not given back.
Step 7: Download, share and use it
A finished project shows the video with Download, Share (X, Facebook, Telegram, WhatsApp or a copied link) and Create another, and it stays under My MVs. The pricing page lists watermark-free music video downloads as a membership benefit.
On rights, the MV supplement in MuseGen’s terms leaves ownership of what you generate with you, in line with its music ownership rules. The commercial licence covers works made while you hold an eligible subscription, and anything made on a free plan is for personal, non-commercial use. Where the video goes next has its own rules: 16:9 suits an ordinary YouTube upload and 9:16 suits vertical feeds, and YouTube asks creators to disclose AI-generated music. Our general guide goes through both platforms in detail.
Limits to know first
We wrote this guide from MuseGen’s live Create MV page, pricing page, terms and interface text rather than from a paid render. Output is Standard (480P) or HD (768P), sized for phones and social feeds. Everything else is on the page before you pay: a free 15-second preview, a published price per second of video, and a refund if creation fails.
Ready to star in your own music video?
Open Create MV, choose Image to Video, pick your song and a clear photo, and read the free preview before you pay.
FAQ
Can I use my own photo in an AI music video?
Yes. On MuseGen, the Image to Video tab of Create MV takes one photo as the lead, alongside a finished song. By the page defaults the photo can be a JPG, JPEG, PNG, WebP or HEIC file up to 20 MB, and a face check runs before the script is created.
What kind of photo works best?
A clear, well-lit photo in which one face is visible works best, because MuseGen checks the face first and switches to a scene-only video when none is usable. The page labels the photo as only for model reference. Avoid heavy filters, sunglasses or hats that hide the face, and group shots where it is unclear who the lead is; this is our practical advice rather than a rule on the page.
Can I use someone else's photo?
Only with their permission. MuseGen's terms say you must have all necessary rights and permissions for any audio, video, image, text prompt or other material you use as MV inputs. Use your own photo, or a photo of someone who has agreed to appear in your video.
How long does the whole process take?
According to MuseGen's interface, the script usually takes 10 to 15 minutes and the full video about an hour. You can leave the page and come back, the project appears under My MVs, and an e-mail arrives when it is ready.
How much does an AI music video cost on MuseGen?
The script step costs 10 credits after any free generation and a free 15-second preview comes next. The full video costs 2 credits per second in Standard and 4 in HD, so a 100-second video is 200 or 400 credits, about $4.80 or $9.60, and the cost is quoted before you confirm. New accounts start with 25 one-time free credits, and credits taken for a failed job are refunded.
Can I change the story or a single shot before paying?
Yes. The story page lets you edit six plot parts and the text of each scene, and regenerate the first-frame image of a single shot. Changing the story direction replans every storyboard and image and replaces the existing visuals, so fix the story first and the individual shots afterwards.
What size and quality can I choose?
You choose 16:9 or 9:16 and Standard (480P) or HD (768P). According to the pricing page, membership adds HD music video creation and watermark-free downloads, and your song can be anywhere between 30 seconds and 6 minutes.
Can I use the video commercially or post it on YouTube?
Under MuseGen's terms, ownership of generated MV outputs stays with you. Its commercial licence covers works made while you hold an eligible subscription, and anything made on a free plan is for personal, non-commercial use. YouTube asks creators to disclose AI-generated music in YouTube Studio during upload; we cover the platform rules in our general AI music video guide.
Keep reading
- How to Make an AI Music Video — platform shapes, length limits and what YouTube and Spotify require.
- The 10 Best AI Music Video Generators of 2026 — how Create MV compares with nine other tools.
- How to Write AI Music Prompts — the same describe-the-scene habit, for the song itself.
- The 10 Best AI Lyrics Generators of 2026 — if the words come first.
- The 10 Best AI Music Generators of 2026 — if the song comes first.
Sources
- MuseGen — Create MV. Source of the tabs, photo and song limits, description and title limits, ratio and resolution options, the 10-credit script step, and the interface text for the face check, story, first frames, preview, unlock, refunds and timings.
- MuseGen — Pricing. Source of the free 15-second preview wording, the price per second of video, the plans, and the HD and watermark-free membership benefits.
- MuseGen — Terms of Service, MV Services Supplement, and the Commercial License Terms. Source of the ownership, input-rights and free-plan wording.