What Is Audio Mastering? A Clear Guide to Music's Final Step

MuseGen Team
8/21/2026
Your mix sounds great in your headphones. Then you drop it into a playlist next to a commercial release and it feels quiet, dull, and somehow smaller — even though every part is there. The gap you're hearing is almost always the last stage of production, the one with a reputation for being a "dark art": mastering. It's what turns a finished mix into a track that sounds consistent, competitive, and ready to release everywhere.
In short
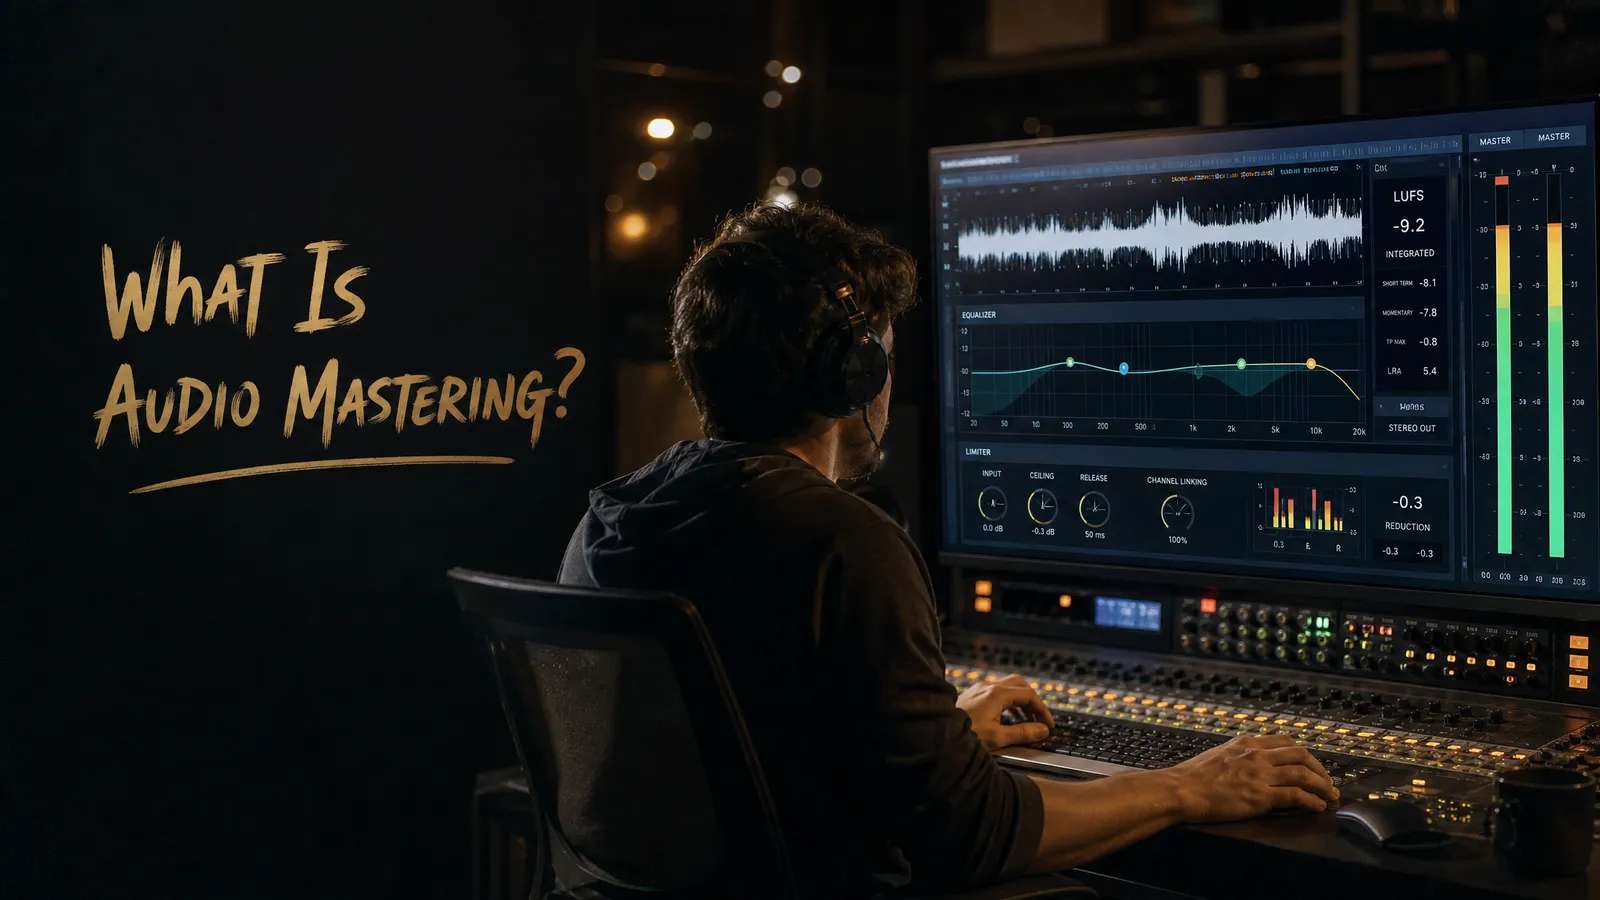
Audio mastering is the final stage of music production — it takes a finished stereo mix and polishes the whole track into a cohesive, release-ready master that sounds consistent and competitive everywhere. It comes after mixing and before distribution.
Quick facts
- What it is: The final polish that turns a finished mix into a release-ready master.
- Not mixing: Mixing balances many separate tracks; mastering treats the whole stereo mix.
- Main tools: EQ, compression, limiting, stereo width, and loudness (LUFS) control.
- Streaming target: Around -14 LUFS integrated, -1 dBTP true peak (approximate; verify per platform).
- Why it matters: Consistency, translation across devices, and competitive loudness.
What mastering actually is
Mastering is the process of taking a completed mix and applying the final touches that make it sound polished, consistent, and ready to release. As iZotope describes it, that means elevating certain sonic characteristics — adjusting overall level and tone, adding stereo enhancement, and cleaning up anything distracting — so the result is a clean, cohesive sound optimised for playback across every format and system.
In one line: audio mastering comes after mixing and before distribution. Its input is usually a stereo mix, and its output is a release master — the single, definitive file that every stream, download, and copy is made from.
The name is a clue to the job. The term comes from creating a master copy: the single, definitive version of a track from which all other copies — streams, downloads, CDs, vinyl — are made. Audio mastering is the stage of post-production that prepares and transfers that final mix to the master, and its goal is to optimise how the music translates on every playback system.
A useful analogy: if production is baking a cake and mixing is arranging the layers so they sit together, mastering is the icing and finishing — the pass that makes the whole thing look and taste consistent from the first slice to the last. Crucially, mastering works on the stereo mixdown as a single object. The engineer is no longer reaching inside to move one vocal or kick; they're shaping the finished track as a whole.
Mastering vs mixing: the classic confusion
Mixing balances the many separate tracks in a session; mastering polishes the single stereo file those tracks become. The two words get swapped constantly, but they're different jobs at different stages. Mixing takes the many separate tracks from a session — each instrument and vocal on its own channel — and balances their levels, panning, and tone so they sound good together. Mastering happens after the mix is finished and bounced to a single stereo file, and polishes that finished whole so it's consistent and release-ready.
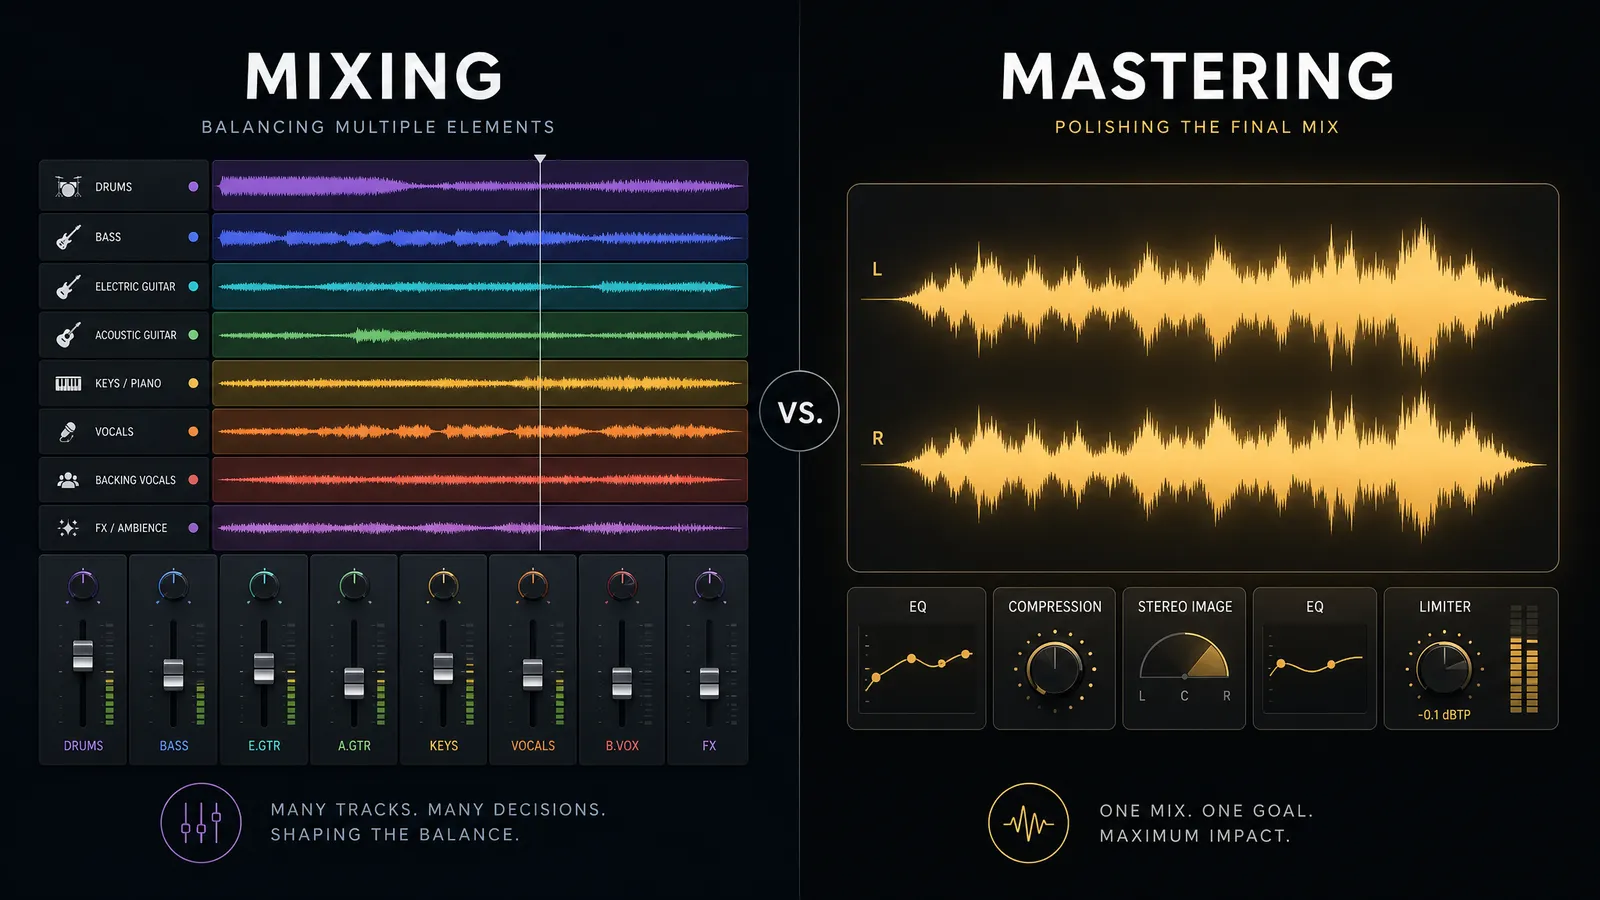
| Aspect | Mixing | Mastering |
|---|---|---|
| Works on | Many separate tracks (stems) | One stereo mixdown |
| Main goal | Make the parts sound balanced together | Make the finished track consistent & competitive |
| Typical tools | EQ, compression, panning, reverb per track | Broad EQ, glue compression, limiting, loudness |
| When | After recording, before mastering | The last step before distribution |
| Output | A single finished mix | A release-ready master per format |
One rule of thumb settles most arguments: if a change involves reaching into the individual parts, it's a mix decision. If it treats the song as one finished object, it's a master decision. That's also why the two are usually kept in separate sessions — more on that in the workflow below.
Why mastering matters
Mastering isn't about making a track "louder" for its own sake. It does three concrete jobs that a mix alone can't.
1. Consistency across a release
On an album, EP, or even a two-single drop, mastering makes every track feel like it belongs to the same record — matched in level, tone, and character so a listener never has to reach for the volume knob between songs. That cohesion is a big part of what makes a release sound "finished" rather than like a folder of separate files.
2. Translation across playback systems
Your mix might sound perfect on your monitors and fall apart on phone speakers, earbuds, or a car stereo. Mastering's core purpose is translation: broad tonal moves that keep the track sounding right on the widest possible range of systems, from a tiny Bluetooth speaker to a club rig.
3. A competitive, controlled level
A master sits at a considered loudness and tonal balance so it holds up next to other tracks in the same genre or playlist. This is less about winning a loudness war (streaming ended that — see below) and more about density and control: a good master sounds bigger even at the same measured volume.
The honest test: play your track right after a commercial release in the same genre, at the same volume. If yours sounds thinner, duller, or less consistent — that difference is what mastering is for.
What a master actually does
Under the hood, mastering is a short chain of small, broad moves — not dozens of surgical edits. Here are the six things that chain is usually doing.
1. Tonal (corrective) EQ
Gentle, broad EQ shapes the overall frequency balance so the track isn't too boomy, harsh, or dull on any system. Moves are usually fractions of a decibel across wide bands — enough to nudge the balance, never to remix it.
What it's for: tame a resonant low-mid buildup, add a touch of air up top, or roll off sub rumble — small tonal corrections that translate everywhere.
2. Compression and glue
Light compression across the whole mix evens out the level and makes the sections feel like one cohesive record rather than a series of parts. "Glue" is the right word: it binds the elements together without obviously squashing them.
What it's for: even out a chorus that jumps too far above the verse, and add a sense of density and cohesion to the whole track.
3. Limiting and loudness
A limiter raises the overall level to a competitive loudness while a true-peak ceiling stops the signal from clipping. This is where loudness is set — carefully, because pushing too hard crushes the life out of a track.
What it's for: reach a target loudness (see LUFS below) while keeping a true-peak ceiling around -1 dBTP so nothing distorts after streaming encodes it.
4. Stereo width and imaging
Mastering can subtly widen the stereo image for space and impact, while keeping the low end centred and mono-solid so it holds together on club systems and small speakers alike.
What it's for: open up the sides for width in the chorus, and keep bass and kick centred so the low end stays powerful and stable.
5. Saturation and tonal colour
A little harmonic saturation adds warmth, density, and perceived loudness — the sense that a track is "bigger" without simply turning it up. It's optional and taste-driven, but it's a big part of a master's character.
What it's for: add analogue-style warmth and perceived loudness, and help a clean digital mix feel fuller and more expensive.
6. Sequencing, spacing, and formats
For a full release, mastering also sets the track order, the gaps and fades between songs, the metadata (like ISRC codes), and the correct export for each destination — a lossless master for distribution, and platform-appropriate files where needed.
What it's for: make an album flow as one listen, and deliver the right file to streaming, download, and physical formats.
Because those moves are broad and global, it helps to be clear about where mastering's power ends — so you fix each problem at the right stage instead of expecting the master to rescue it.
| Mastering can | Mastering cannot |
|---|---|
| Adjust the overall tonal balance | Rebalance an individual vocal or instrument cleanly |
| Control peaks and set a consistent loudness | Repair clipping already printed into the mix |
| Match songs in level and tone across an EP | Replace weak arrangement or mixing decisions |
| Add cohesion, warmth, and perceived size | Recover detail that was never captured in the recording |
Loudness and LUFS: mastering for streaming
LUFS (Loudness Units Full Scale) is how streaming platforms measure perceived loudness, and mastering targets a specific LUFS level rather than simply pushing for "as loud as possible." Platforms measure how loud your track is and adjust playback so listeners don't have to keep changing the volume between songs — which is why the target, not the maximum, is what matters.
As iZotope's guide to mastering for streaming explains, each platform normalises to its own target. These targets are platform specifications you can verify — facts, not production preferences. Approximate 2026 figures: Spotify, YouTube, Tidal, and Amazon Music sit around -14 LUFS integrated, while Apple Music is closer to -16 LUFS — each with a true-peak ceiling around -1 dBTP. Spotify even lets listeners pick a level: roughly -11 (Loud), -14 (Normal), or -23 LUFS (Quiet). These numbers are approximate and platforms adjust them over time, so verify the current spec on each platform before a critical release.
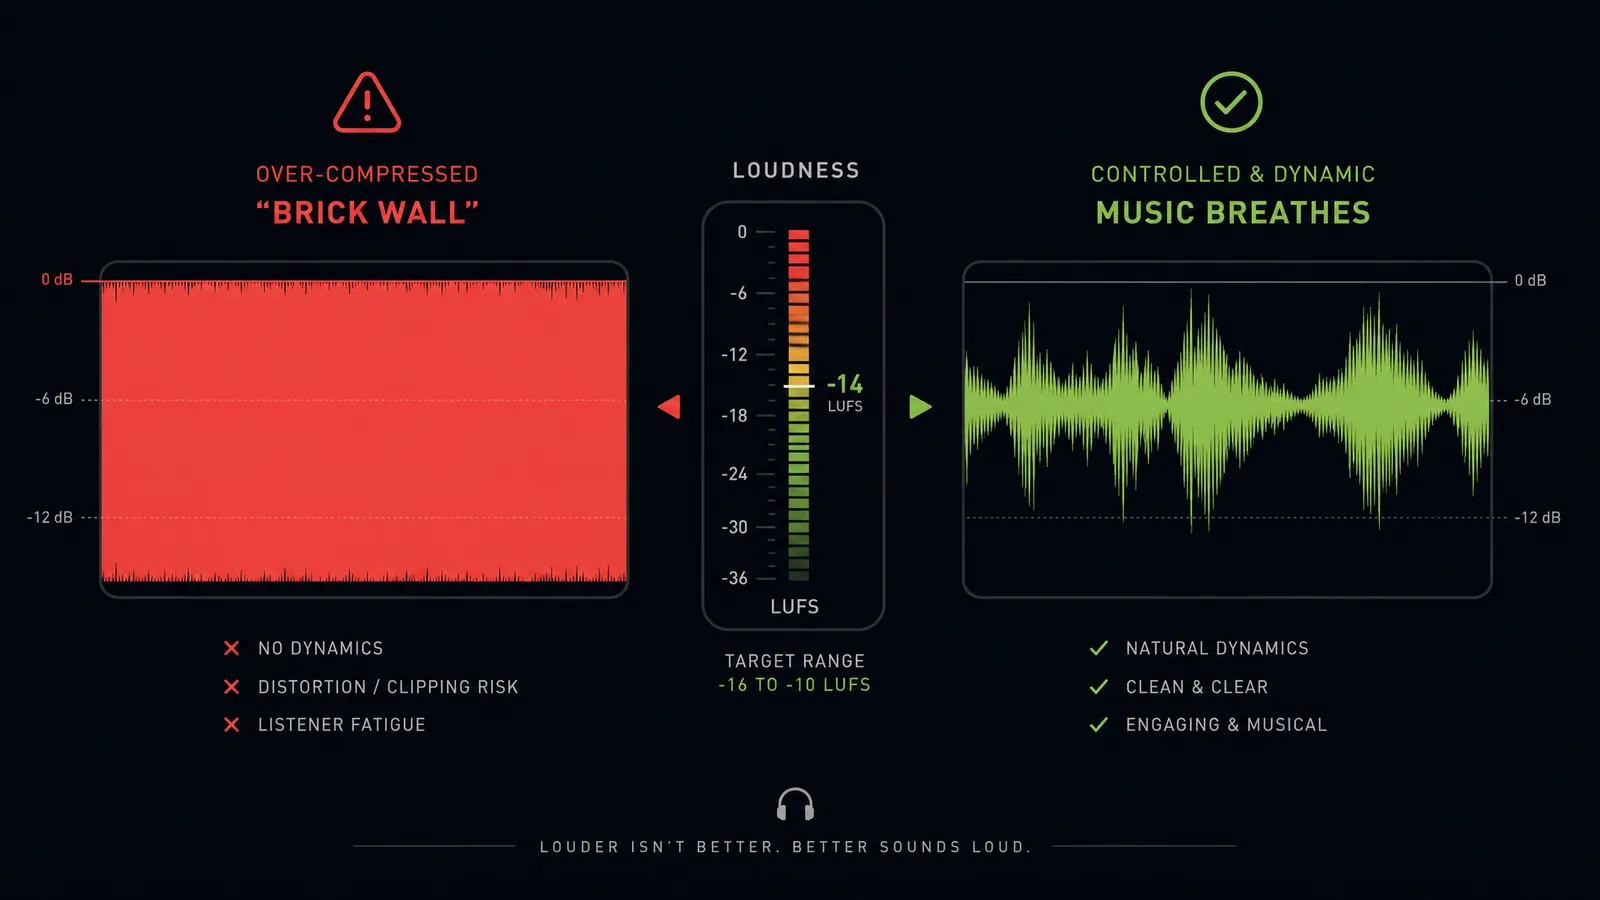
The practical upshot is that the old loudness war is over. If you master far louder than a platform's target, it simply turns your track down on playback — and you're left with all the distortion and squashed dynamics you added to get there. As a practical default — a production choice, not an industry rule — one master around -14 LUFS integrated with a -1 dBTP ceiling works well across services in 2026, so you don't need a separate file per platform.
To make that concrete, here's roughly what a mastering pass does on the meters. These are illustrative, representative figures to show the direction of change — not measurements from one specific song:
| Measure | Before (finished mix) | After (master) |
|---|---|---|
| Integrated loudness | ≈ -18 LUFS-I | ≈ -14 LUFS-I |
| True peak | ≈ -0.2 dBTP (risky) | ≈ -1.0 dBTP (safe headroom) |
| Dynamics (loudness range) | Wider, uneven between sections | Slightly tightened, still musical |
| Perceived result | Quieter, less consistent in a playlist | Louder, denser, cohesive — no obvious pumping |
The key idea: normalisation equalises volume, not impact. Played at the same meter level, a well-controlled master still sounds bigger than a raw export — because of its dynamics, tonal balance, and peak control, not its raw loudness.
Genre matters at the margins: hip-hop, trap, and EDM are often mastered a touch louder and denser, while acoustic, jazz, and classical keep more dynamic range and sit quieter. The -1 dBTP headroom isn't optional flair, either — it stops inter-sample peaks from clipping once the platform re-encodes your file to a lossy format.
A simple mastering workflow
To master a track, work through a fixed order: start from a clean mix, balance the tone, control the dynamics, set the loudness, then reference and export. You don't need a rack of expensive gear — just a clear order of operations. The specific numbers in the steps below are rules of thumb to start from, not fixed industry standards.
- Start from a clean, full-resolution mix. Export the final mix as a full-resolution WAV (24-bit or 32-bit float) with a few decibels of headroom — not already slammed into a limiter. Then step away and come back with fresh ears; many engineers master in a brand-new session, sometimes after a day off, so they can judge the track objectively.
- Balance the overall tone. Make broad, gentle EQ moves on the whole mix to correct any imbalance — a hair less low-mid mud, a touch more air — so the track translates on every system. If you're reaching for big cuts, the fix belongs back in the mix.
- Control the dynamics. Apply light compression or glue to even out the level and bind the sections together. Aim for a couple of decibels of gentle reduction at most — you're smoothing, not squashing.
- Set the loudness with a limiter. Push into a limiter to reach a competitive loudness while keeping a true-peak ceiling around -1 dBTP. Watch the dynamics: if the chorus stops feeling bigger than the verse, you've gone too far.
- Reference, check translation, and export. Compare against commercial tracks in the genre, listen on phone, laptop, earbuds, and a car if you can, then export the right format for each destination.
Example mastering chain
- Corrective EQ — broad, sub-decibel tonal moves
- Glue compressor — ~1–2 dB gentle reduction
- Saturation — subtle warmth / density (optional)
- Limiter — target around -14 LUFS, ceiling -1 dBTP
- Meter — check LUFS + true peak before export
A simple, trustworthy chain beats a stack of flashy plugins. Half-decibel decisions and honest metering matter far more than the number of processors.
Want to see the idea explained end to end? This short beginner walkthrough covers what mastering is and how it differs from mixing:
DIY, AI, or a mastering engineer?
There are three realistic ways to get a master, and the right one depends on the stakes, budget, and how much you enjoy the technical side.
| Option | Best for | Trade-off |
|---|---|---|
| Master it yourself | Learning the craft; full control; no per-track cost | Steep learning curve; hard to stay objective on your own music |
| AI mastering service | Fast, cheap, consistent results for demos and many indie releases | Less nuance and context than a skilled human; check the service's terms |
| A mastering engineer | Critical or commercial releases where taste matters most | Costs more and takes longer; still needs a strong mix going in |
AI mastering has come a long way and is genuinely good enough for a lot of independent music, social clips, and demos — it analyses your track and applies a balanced chain in seconds. For a flagship single or an album you care about, a human engineer's ear and context still tend to win. Whatever you choose, the input rule never changes: start from the cleanest mix you can, because no master fixes a broken balance.
A pre-master checklist
Most mastering problems are actually mix problems in disguise. Run through this before you master — and before you call a master done.
- Bounce a clean mix. Export a full-resolution WAV with a few dB of headroom, with no limiter slammed across the master bus.
- Fix mix issues in the mix. Muddy low end, harsh vocals, or a lopsided balance are mix jobs — don't expect the master to rescue them.
- Rest your ears. Master with fresh ears, ideally in a new session and after a break, so you can judge the track objectively.
- Make small moves. Broad, sub-decibel EQ and a couple of dB of gentle compression — if you're making big moves, go back to the mix.
- Watch your true peak. Keep a ceiling around -1 dBTP so the track doesn't clip after lossy encoding.
- Meter the loudness. Check integrated LUFS against your target (around -14 for most streaming) instead of trusting your eyes on the waveform.
- Protect the dynamics. If the chorus stops feeling louder than the verse, you've limited too hard — back off.
- Reference and translate. A/B against commercial tracks and listen on phone, earbuds, laptop, and car before you sign off.
- Match a release. On an EP or album, check that every track sits at a consistent level and tone.
- Export what each destination needs. Keep a lossless master and deliver platform-appropriate files.
Where MuseGen fits
Here's the honest picture: MuseGen is an all-in-one creation tool, not a dedicated mastering suite. If you have your own external mix that you want mastered to a spec, that's a job for a mastering engineer or a purpose-built mastering service. Where MuseGen helps is one step earlier — getting you to a finished, export-ready track in the first place.
Because MuseGen generates complete songs, you can write a structured lyric, turn it into a finished song, and export it as royalty-free WAV or MP3 (always check MuseGen's current terms before commercial use) — so for AI-made tracks you often have a balanced, shareable result without running a separate mastering pass yourself. You can also create a music video once you're happy with the song, or convert an MP3 to WAV when a destination needs a lossless file.
Think of it as a division of labour: MuseGen gets you a finished song fast, and if a release needs a critical, spec-perfect master, you hand that export to a mastering step built for exactly that.
Skip straight to a finished, export-ready track — draft the lyrics, generate the song, and export it in one place, ready to share. → Make a song with MuseGen
FAQ
What is audio mastering?
Audio mastering is the final stage of music production. It takes a finished stereo mix and applies a light polish across the whole track — using EQ, compression, limiting, stereo, and loudness adjustments — to make it sound cohesive, consistent, and competitive on every device and platform. It comes after mixing and before distribution.
What is the difference between mixing and mastering?
Mixing works with the many separate tracks from a session, balancing their levels, panning, and tone so they sound good together. Mastering happens afterward and works on the single stereo mixdown, polishing the whole track and making it consistent across a release and across playback systems. Mixing is about the parts; mastering is about the finished whole.
Do I really need to master my music?
For anything you release publicly, mastering is strongly recommended. It's what makes your track sit at a consistent level and tone next to commercial songs on a playlist, and translate well from phone speakers to car systems to headphones. For rough demos or private sharing you can skip it, but a released track almost always benefits from a mastering pass.
What LUFS should I master to for streaming?
A safe universal default in 2026 is around -14 LUFS integrated with a true-peak ceiling near -1 dBTP, which works well across Spotify, YouTube, Tidal, and Amazon Music. Apple Music normalises closer to -16 LUFS. These figures are approximate and platforms adjust them, so verify the current specs on each platform. Because platforms normalise playback, mastering far louder than the target no longer wins — it just gets turned back down.
Can you mix and master in the same session?
It's better to keep them separate. Mastering benefits from fresh ears and from judging the mix as a finished whole rather than continuing to tweak individual tracks. Many engineers export the final mix and open a brand-new session, sometimes after a day's break, so they can hear the track objectively before mastering it.
Is AI mastering good enough?
AI mastering services are fast, affordable, and good enough for demos, social clips, and many independent releases. A skilled human mastering engineer still tends to win on nuanced, critical releases where taste and context matter. Whichever you use, start from a clean mix and check the tool's current terms before relying on the result commercially.
Does mastering fix a bad mix?
No. Mastering polishes a good mix; it can't repair a bad one. Problems like a muddy low end, harsh vocals, or unbalanced levels are mix issues and should be fixed in the mix. Mastering makes small, broad moves across the whole track, so if the balance is wrong going in, it will still be wrong coming out.
Sources
- iZotope — "What is audio mastering?" for what mastering does to a finished mix.
- iZotope — "How to master for streaming platforms: normalization, LUFS, and loudness" for platform loudness targets.
- Wikipedia — "Audio mastering" for the master copy and post-production definition.
- WaveLab — "What is Mastering? | Mastering for Beginners" (video) for a plain-English explainer of the final step.